AirDoctor Air Purifier Maintenance: The Complete Guide for All Models (2023)

Written By: Dr Fahad Yasin
- Updated On:
Table Of Content
1. Frequency of Filter Changes
AirDoctor Model
Filter Type
Replacement Frequency
AD1000
Filter Set
Every 6 months
AD2000
Ultra HEPA
Every 12 months
Carbon/Gas Trap/VOC
Every 6 months
AD3000
Ultra HEPA
Carbon/Gas Trap/VOC
Every 12 months
Every 6 months
AD5500
2 x Ultra HEPA
2 x Carbon/Gas Trap/VOC
Every 12 months
Every 6 months
AirDoctor Model
Filter Type
Replacement Frequency
AD1000
Filter Set
Every 6 months
AD2000
Ultra HEPA
Every 12 months
Carbon/Gas Trap/VOC
Every 6 months
AD3000
Ultra HEPA
Every 12 months
Carbon/Gas Trap/VOC
Every 6 months
AD5500
2 x Ultra HEPA
Every 12 months
2 x Carbon/Gas Trap/VOC
Every 6 months
2. Filter Maintenance
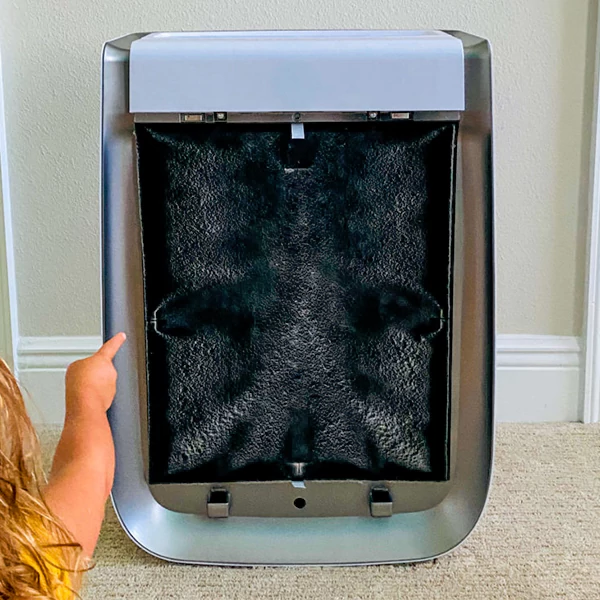
AirDoctor requires minimal upkeep. The pre-filter, the first one visible when you open AirDoctor’s filter covers, should be vacuumed every couple of months.
This keeps your unit’s air output fresh and prolongs the lifespan of the carbon and Ultra HEPA filters, which should be replaced and not cleaned. The filter replacement timeline for the models based on 24/7 use and average air quality homes is the same as in point 1.
2a. Cleaning AirDoctor 1000

Pre-filter in AirDoctor 1000
- 1. Make sure the unit is turned off and unplugged. With the rear of the unit facing forward, pull the lid towards you at the upper end as shown and remove the rear cover.
- 2. Remove the UltraHEPA™ and Carbon/VOC filters by pulling the tabs straight out on the top and bottom of the filters.
- 3. Using the crevice tool, vacuum the outside of the UltraHEPA™ filter to remove large contaminants collected on the pre-filter.
- 4. Install the UltraHEPA™ filter back into the AirDoctor AD1000 housing.
- 5. Install the rear cover by first inserting the bottom hooks on the cover into the back housing before pushing the cover into the upright position on the AirDoctor housing.
Replacing Filters in AirDoctor 1000

- 1. Make sure the unit is turned off and unplugged. With the rear of the unit facing forward, pull the lid towards you at the upper end as shown and remove the rear cover.
- 2. Remove the UltraHEPA™ and Carbon/VOC filters by pulling the tabs straight out on the top and bottom of the filters.
- 3. The Carbon/VOC filter sits inside the HEPA filter. To remove the filter, simply pull up on the inner filter to separate it from the HEPA filter. Insert your new UltraHEPA™ and Carbon/VOC filters and slide them back into the rear of the unit, then insert the bottom of the inlet grill first and then snap the upper part of the rear cover back into position.
- 4. Make sure the bottom hooks are properly in place before snapping them up to their upright and locked position.
- 5. To reset your Change Filter alert press and hold the Ion and Dim buttons for 5 seconds until the alert light(s) turns off.

2b. Cleaning AirDoctor 2000

Pre-filter in AirDoctor 2000
- 1. Make sure the unit is turned off and unplugged. With the unit facing forward, pull the cover towards you at the upper end and remove the front cover.
- 2. Gently vacuum your Pre-Filter. You may do this monthly or as needed if there is more build-up.
- 3. After you’ve vacuumed your Pre-Filter simply place the front cover back on your AirDoctor.
Replacing the Filters for the AirDoctor 2000

- 1. Make sure the unit is turned off and unplugged. With the front of the unit facing forward, pull the lid toward you at the upper end as shown and remove the front cover.
- 2. Remove the UltraHEPA and Carbon/Gas Trap/VOC Filters by lifting and pulling the tabs on both sides of the filters.
- 3. Insert new UltraHEPA and Carbon/Gas Trap/VOC Filters, then insert the bottom of the inlet grill first and then snap the upper part of the front cover back into position.
- 4. To close the front cover, first make sure the bottom hooks are properly in place before snapping it up to its upright and locked position.

Pre-filter in AirDoctor 3000
- 1. Make sure the unit is turned off and unplugged. With the front of the unit facing forward, pull the lid towards you at the upper end as shown and remove the front cover.
- 2. Vacuum your pre-filter monthly or sooner if there is more build-up.
- 3. After you've vacuumed your pre-filter simply place it back in your AirDoctor 3000.
- 4. NOTE: Never wash your Carbon/VOC Filter or UltraHEPA Filter

- 1. Make sure the unit is turned off and unplugged. With the front of the unit facing forward, pull the lid towards you at the upper end as shown and remove the front cover.
- 2. Remove the UltraHEPA™ and carbon/gas trap/VOC filters by lifting and pulling the tabs on both sides of the filters.
- 3. Insert new UltraHEPA™ and carbon/gas trap/ VOC filters, then insert the bottom of the inlet grill first and then snap the upper part of the front cover back into position.
- 4. To close the front cover, first, make sure the bottom hooks are properly in place before snapping it up to its upright and locked position.
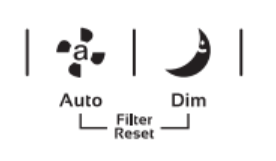
- 5. To reset your Change Filter alert press and hold the Auto and Dim buttons for 5 seconds until the alert light(s) turns off.

2d. Cleaning AirDoctor 5500

Pre-filter in AirDoctor 5500
- 1. Make sure the unit is turned off and unplugged. With the front of the unit facing forward, pull the filter cover towards you from the top and remove the cover completely.
- 2. Remove reusable Pre-Filter from the unit by pulling on the two tabs on the Pre-Filter.
- 3. To clean the Pre-Filter, vacuum the Pre-Filter.
- 4. Reinstall Pre-Filter into the unit.
Replacing Filters in AirDoctor 5500

For a detailed demonstration, you can check this video.
- 1. Make sure the unit is turned off and unplugged. With the front of the unit facing forward, pull the lid towards you at the upper end as shown and remove the front cover.
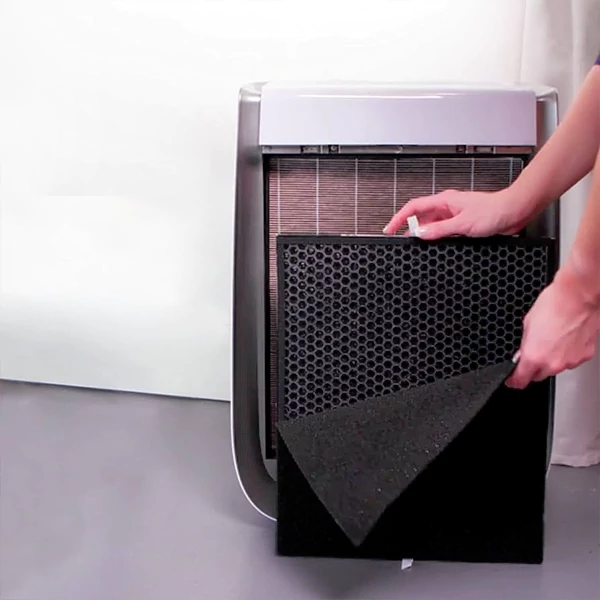
- 2. Remove the UltraHEPA™ and Carbon/Gas Trap/ VOC Filters by lifting and pulling the tabs on both sides of the filters. The Pre-filter is the first filter removed and the last filter installed.
- 3. Insert new UltraHEPA™ and Carbon/Gas Trap/ VOC Filters, then insert the bottom of the inlet grill first and then snap the upper part of the front cover back into position.
- 4. To close the front cover, first, make sure the bottom hooks are properly in place before snapping it up to its upright and locked position.
- 5. To reset your Change Filter alert press and hold the Auto and Dim buttons for 5 seconds until the alert light(s) turns off.

Conclusion
Regular maintenance of your AirDoctor’s filters ensures peak performance and clean, fresh air in your home or office. Following these steps will help you get the most out of your air purifier, prolonging its service life and enhancing your air quality. Stay diligent with your maintenance, and your AirDoctor will take good care of your indoor air!

